
Table of Contents
Introduction to Gauges in Automobiles

Gauges are critical components of an automobile’s electrical system, providing drivers with essential information about the vehicle’s performance and status. Today, we will explore various types of gauges used in automotive electrical systems and their respective functions.
Fuel indicator
A fuel indicator, also known as a fuel gauge, is an instrument found in vehicles to display the amount of fuel remaining in the tank. It typically consists of two main components:
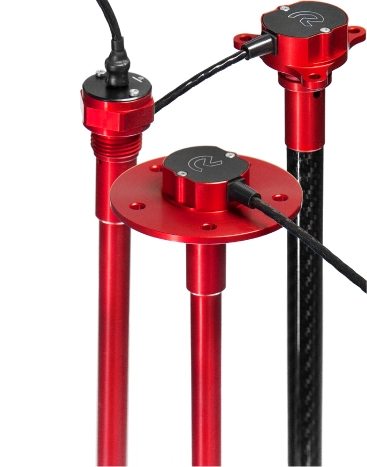
Fuel Sending Unit: Located inside the fuel tank, this device measures the amount of fuel and sends the information to the gauge on the dashboard. It usually consists of a float connected to a potentiometer. As the fuel level changes, the float moves, altering the resistance in the circuit, which in turn affects the reading on the fuel gauge.
Fuel Gauge: Displayed on the dashboard, this gauge visually represents the fuel level. It can be analog, with a needle pointing to the level (e.g., “E” for empty, “F” for full), or digital, showing the exact amount or percentage of fuel left.

Some modern vehicles also provide additional information, such as the estimated range (how far you can drive with the remaining fuel), through the car’s onboard computer.
Type of Fuel Gauges
Fuel indicators can be categorized into several types based on their design and technology:
1. Analog Fuel Gauge:

Description: The most traditional type, featuring a needle that moves across a dial marked with “E” (Empty) and “F” (Full).
Operation: As the fuel level changes, the sending unit in the tank sends a signal to the gauge, which moves the needle accordingly.
Common Use: Found in older or more basic vehicles.
2. Digital Fuel Gauge:

Description: Displays the fuel level in a digital format, often as a percentage or with bars.
Operation: It receives a signal from the sending unit and translates it into a digital readout on the dashboard.
Common Use: More prevalent in modern vehicles with digital dashboards.
3. Segmented LED/LCD Fuel Gauge:

Description: Uses a series of bars (LED or LCD segments) to represent the fuel level. Each bar represents a certain percentage of the fuel tank.
Operation: The sending unit’s signal is translated into the number of illuminated bars, representing how full the tank is.
Common Use: Common in motorcycles, scooters, and some compact cars.
4. Capacitive Fuel Gauge:
Description: Utilizes a capacitive sensor inside the fuel tank that measures the level based on the dielectric constant of the fuel.
Operation: Changes in capacitance are converted to a fuel level reading.
Common Use: Used in some advanced and luxury vehicles due to its accuracy.
5. Pressure-Based Fuel Gauge:

Description: Measures the pressure exerted by the fuel column in the tank to determine the level.
Operation: A sensor reads the pressure, and the data is used to calculate the fuel level.
Common Use: Mostly used in specific industrial or heavy-duty vehicles.
6. Ultrasonic Fuel Gauge:

Description: Uses ultrasonic waves to measure the distance between the sensor and the surface of the fuel.
Operation: The time it takes for the ultrasonic waves to bounce back to the sensor is used to determine the fuel level.
Common Use: Some advanced automotive systems and fuel monitoring applications.
Each type of fuel indicator has its advantages and is suited to different vehicle types and user needs.
Working of Fuel Gauges
The working of a fuel indicator, or fuel gauge, involves several key components and steps.
1. Fuel Sending Unit
Location: Inside the fuel tank.
Components: Typically consists of a float, a metal rod, and a variable resistor (potentiometer).
Operation:
Float: The float, made of a buoyant material, sits on the surface of the fuel. As the fuel level changes, the float rises or falls.
Rod and Potentiometer: The float is attached to a metal rod, which is connected to the potentiometer. As the float moves, it changes the position of the rod, which in turn changes the resistance in the potentiometer.
Signal Transmission: The potentiometer adjusts the electrical resistance based on the fuel level. This resistance change alters the current flowing through the circuit, generating a signal proportional to the amount of fuel.
2. Fuel Gauge (Indicator)
Location: On the vehicle’s dashboard.Components: The gauge itself, which can be analog (with a needle) or digital (with a display).
Operation:
Analog Gauge: In analog systems, the signal from the sending unit moves the needle on the gauge. For example, when the fuel tank is full, the resistance is low, allowing more current to pass through, which moves the needle towards “F” (Full). As the fuel level drops, the resistance increases, reducing the current and moving the needle towards “E” (Empty).
Digital Gauge: In digital systems, the signal is converted into a numerical or bar readout on the dashboard. The digital display shows the exact amount of fuel left, often as a percentage or range (e.g., miles/km remaining).
3. Additional Features
Low Fuel Warning Light: Many vehicles are equipped with a low fuel warning light that turns on when the fuel level falls below a certain threshold (usually around 10-15% of the tank’s capacity). This is triggered by the same sending unit.
Fuel Range Estimator: In more advanced vehicles, the onboard computer uses data from the fuel gauge and other sensors (such as the vehicle’s speed and fuel consumption rate) to estimate the remaining range (distance that can be traveled with the remaining fuel).
4. Modern Enhancements
Capacitive, Ultrasonic, or Pressure-Based Systems: Some modern vehicles use more sophisticated technologies like capacitive sensors, ultrasonic waves, or pressure sensors to measure fuel levels more accurately. These systems might eliminate the need for moving parts (like the float), which can wear out over time.
Oil Pressure Gauge

An oil pressure gauge is an instrument in a vehicle that measures and displays the oil pressure in the engine. Proper oil pressure is crucial because it ensures that the engine’s moving parts are properly lubricated, reducing wear and preventing overheating.
Components of an Oil Pressure Gauge System
1. Oil Pressure Sensor (Sending Unit):
Location: Usually located on the engine block.
Function: Measures the pressure of the oil circulating through the engine and sends a corresponding signal to the gauge.
Types:
Mechanical Sending Unit: Uses a diaphragm or Bourdon tube that deforms under pressure, mechanically driving the gauge.
Electrical Sending Unit: Uses a variable resistor (similar to the fuel sending unit) where the resistance changes with oil pressure.
2. Oil Pressure Gauge (Indicator):
Location: On the vehicle’s dashboard.
Function: Displays the oil pressure as measured by the sensor.
Types:
Analog Gauge: Has a needle that points to the current oil pressure on a scale (typically measured in PSI or bar).
Digital Gauge: Shows the oil pressure as a digital readout.
How the Oil Pressure Gauges Works
1. Oil Pressure Sensor Operation:
Mechanical System: In a mechanical oil pressure gauge, the oil flows directly into the gauge through a small tube. The oil pressure causes a diaphragm or Bourdon tube inside the gauge to expand or contract. This mechanical movement is transferred to the needle on the gauge, indicating the oil pressure.
Electrical System: In an electrical system, the oil pressure sensor is typically a variable resistor connected to the oil circuit. As the oil pressure changes, it changes the resistance within the sensor. This change in resistance alters the electrical current sent to the oil pressure gauge.
2. Gauge Display:
Analog Display: The gauge needle moves across the scale to indicate the oil pressure. For example, when the engine is running properly, the needle should point to a middle range (typically between 20-80 PSI).
Digital Display: The dashboard shows the oil pressure as a numeric value.
3. Monitoring Oil Pressure:
Normal Operation: When the engine is running, the oil pump circulates oil through the engine. The oil pressure gauge helps ensure that the oil pressure remains within the optimal range. If the pressure is too low, it could indicate a problem like an oil leak, worn-out oil pump, or low oil levels.
Low Oil Pressure Warning: Most vehicles have a low oil pressure warning light that illuminates if the pressure drops below a safe level. This light often accompanies a gauge that shows the actual pressure.
Importance of the Oil Pressure Gauges
Engine Protection: Proper oil pressure is essential for keeping the engine lubricated, which prevents excessive friction, overheating, and potential engine failure.
Early Warning System: The oil pressure gauge provides an early warning if something goes wrong with the engine’s oiling system, allowing the driver to take action before serious damage occurs.
Diagnostic Tool: Fluctuations in oil pressure can indicate issues like oil pump failure, clogged oil filters, or engine wear, which might require maintenance or repairs.
Water Temperature Gauge

A water temperature gauge in a vehicle measures and displays the temperature of the engine’s coolant. This gauge is crucial for monitoring the engine’s operating temperature and preventing overheating, which can cause serious engine damage.
Components Involved
1. Temperature Sending Unit (Sensor):
Location: Typically mounted on the engine block or cylinder head, in direct contact with the engine’s coolant.
Function: Measures the temperature of the coolant and sends a corresponding signal to the gauge on the dashboard.
Types of Water Temperature Gauges
Thermistor-based Sensor: The most common type, which changes its electrical resistance based on the temperature of the coolant.
2. Water Temperature Gauge:
Location: Displayed on the vehicle’s dashboard.
Function: Shows the engine’s coolant temperature.
Types
Analog Gauge: Features a needle that moves across a scale, usually marked with “C” for cold and “H” for hot, or with numbers representing the temperature.
Digital Gauge: Shows the coolant temperature as a numerical value on a screen.
Working of the Water Temperature Gauges
1. Temperature Sending Unit Operation
Thermistor Sensor:
Material: The sensor typically contains a thermistor, a type of resistor whose resistance changes with temperature. Most thermistors in temperature sensors are Negative Temperature Coefficient (NTC) types, meaning their resistance decreases as the temperature increases.
Temperature Measurement: When the engine coolant heats up, the thermistor’s resistance decreases, altering the electrical current that flows through the sensor.
Signal Transmission: The water temperature gauge on the dashboard receives a signal from the change in current.
2. Gauge Display
Analog Gauge:
Needle Movement: The temperature sensor’s signal moves the gauge needle. When the engine is cold, the needle points towards the “C” (cold) mark. As the engine warms up, the needle moves toward the center or “normal” operating range. If the engine begins to overheat, the needle moves toward the “H” (hot) mark.
Normal Range: Most analog gauges are designed so that when the engine is operating at the correct temperature, the needle stays within a central or normal range, usually marked to indicate safe operating conditions.
Digital Gauge:
Numerical Display: The digital gauge converts the sensor’s signal into a numerical temperature reading, often in degrees Celsius (°C) or Fahrenheit (°F). This gives the driver a precise understanding of the coolant temperature.
3. Monitoring and Warnings
Normal Operation:
Temperature Range: During normal operation, the gauge should indicate a temperature within the engine’s optimal operating range, usually between 195°F and 220°F (90°C to 105°C). This ensures the engine is running efficiently without risk of overheating.
Overheating Warning:
Warning Light: If the coolant temperature exceeds safe levels, many vehicles have a warning light or indicator that will illuminate, alerting the driver to the potential for engine overheating. This warning often triggers at around 240°F (115°C).
Preventive Action: Overheating can cause significant engine damage, so if the gauge indicates a high temperature or the warning light comes on, it’s important to stop the vehicle and address the issue immediately.
Importance of the Water Temperature Gauges
Engine Health: The gauge helps ensure the engine is running at the correct temperature, which is essential for optimal performance and longevity.
Overheating Prevention: By providing real-time feedback on the engine’s temperature, the gauge helps prevent overheating, which can cause severe damage, such as a blown head gasket or warped cylinder heads.
Diagnostic Tool: Consistently high or low readings on the temperature gauge can indicate issues such as a failing thermostat, a coolant leak, a clogged radiator, or a malfunctioning water pump, allowing for timely diagnosis and repair.
FAQ
What does a gauge do in a car?
The most common gauges that can be seen are the speedometer, tachometer, fuel gauge, oil pressure gauge, and temperature gauge. Sometimes, there is also a voltmeter to show the charge of the car and an odometer to show the mileage on the dashboard. All of these gauges are an indicator of the status of your car.
What is the fuel gauge in a car?
In automotive and aerospace engineering, a fuel gauge indicates the amount of fuel in a fuel tank.
You may also like